
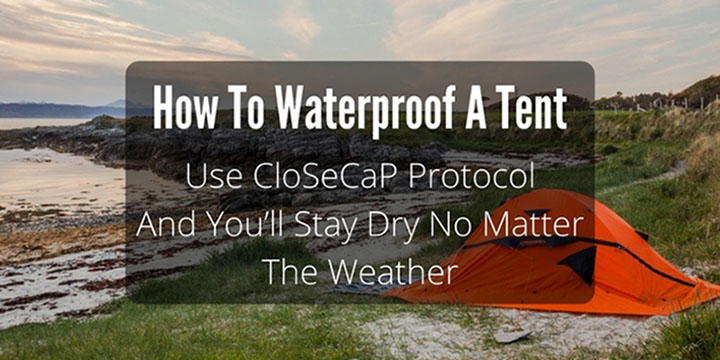
You’re out in the woods and you are all set up and have the fire going merrily. Suddenly, you feel the first drops of rain. You smile and shoo the family inside your tent. You douse the fire and go inside yourself. The sky opens up and a deluge of historic proportion lets loose.
You’re not worried, you are secure in the knowledge that your tent is dry and no water will get inside.
Meanwhile, in a neighboring tent, a family huddles cold and wet. Their tent is leaking like a sieve. The seams are letting in more water than a dike, that’s collapsing and there is no boy from Denmark to use his finger to plug the leaks.
- What is the difference between the two tents?
- Is it quality? No. Both tents are similar.
- Perhaps, the tent is just too old.
- Again, No, The leaking tent is only a season old.
- So, why is one family dry and warm, while another is wet and shivering with cold?
Table of Contents
The Answer?
Preparation!
 The first family sealed their tent prior to their trip into the great outdoors and the second family grabbed their tent, which was stored in the garage and just hit the highway. Now they are paying the price for not thinking ahead.
This may have happened to you or someone you know.
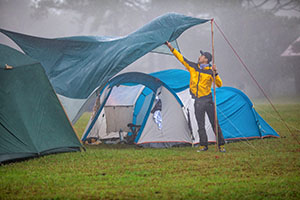
Today, we are going to show you how to prevent a leaky tent from ruining your camping fun. A properly sealed tent will shed water like a duck’s back and keep you snug and dry.
So, how do you go about sealing a tent and getting ready to resist rain and the wind that Mother Nature can throw at you?
Here’s what you’ll get from today’s article
You are about to learn three valuable secrets to prepping your tent for outdoor use.
- Checking your tent
- Sealing your tent
- Checking it again and packing it away
The CloSeCaP Protocol is our mnemonic we use to remind people what to do if they want to have a great holiday/vacation trip camping without the worries of getting soaked if bad weather comes along.
What you can expect to learn?
You will know what to look for in your tent prior to hitting the woods, mountain trails, and the beach for your next outing.
How to seal your tent and then what to do next to get it put away and ready to go on that family outing that will bring happy memories and a fun time instead of discomfort and hardship that could make you swear off camping for good.
1. Check Your Tent For Leaks
2. Sealing Your Tent
This does not mean, just going over the areas, you think have are problems.
You need to cover all the bases.
Step inside the tent, taking a roll of masking tape and mark off each seam 1/8″ on each side. (1/4″ of an inch near the where the floor and the sidewalls of the tent join.
Next, using a seam-sealing compound that is made for your tent’s material, you will brush sealant between the tape covering the seam and outside to the edges of the tape.
If you want to be doubly secure, do the same to the outside seams as well.
Close all doors and flaps and do the same around the perimeter of the doors. Do not foul the zippers, however.
Layout the weather fly on the ground upside down and seal the seams there as well.
Allow the tent to air out and let the sealant cure for 24 hours. Some of the sealants you can use, depending on the material of your tent are shown here:
 Some work on the seams while others can be applied to the sidewalls and flooring of your tent as well. Seam tape may be used if yours is in need of replacement or reinforcing.
You should also be prepared in the field as well in case of emergency repairs as well. Here bringing along some seam tape (show at the link above) as well as sidewall repair tape to plug and holes or seal and rips or tears.
Patches are also a nice thing to have along also.
Now that you got the seams out of the way, you need to do the shell as well
Contrary to popular belief, your tent’s sidewalls can leak as well. Canvas and PollyCotton tents have a coarser weave to their material and soaking the tent and letting it dry, prior to going out to the forest preserve, will tighten things up.
But, to be doubly sure you may want to take out an insurance policy. One that especially needed if you have bought a Wal-Mart special and even the tents that cost you hundreds of dollars can benefit from having the sides waterproofed as well.
Products like Nikwax can help you here.
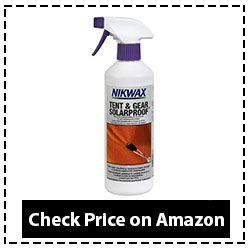 You wet down the sides of your tent, apply the product via a sponge, and then let everything dry. Again, remember the weather fly and do the same for it as well. The product also comes in a spray bottle as well, which makes it a simpler way to get the work done and saves time as well.
It also protects the fabric of your weather fly and tents shell from UV degradation, which can cause plastics to crack and crumble if your tent is out in the sun at the beach or other venues for a lengthy period of time. Think of it as suntan lotion for your tent.
Another product that does a good job for the weather fly as well as the ground tarp/cloth along with the tent bag and gear bag as well.
You do not want the tent bag to allow moisture through as it will undo all the work you have done by allowing mildew to get a hold on your tent’s material.
You don’t have to go with any of the products as we don’t endorse these products, the ones we’ve shown you are examples of what you should be looking for when you want to make sure your tent is ready for the wild.
3. Check Your Tent Again
Check your tent again using the water treatment as you did at the beginning of this article. Your tent should be as dry as a bone inside. You will then let the tent dry thoroughly, very carefully, fold, pack your tent up into its freshly waterproofed tent bag, and put all the gear into its associated gear bag as well.
Your tent’s instruction book should have instructions for that or if you go up to YouTube you can type in the keywords “Folding” or “Packing” “a tent.”www.YouTube.com
Final thoughts
Keeping dry and warm on your next camping trip or holiday outing is much easier if you plan for rain. Ensuring your tent is waterproof beforehand prevents you from having to bail out your tent when the weather goes wonky on you.
By following the CloSeCaP Protocol, we have outlined for you can get outdoors pitch your tent, and then proceed to have a wonderful time.
Remember:
- Check
- Seal
- Check and pack
By doing this, your tent will last longer and you’ll never have to wonder if you will stay dry or not when Mother Nature throws a fit.
So, if you are an outdoor enthusiast, hunter, hiker, and even a Dooms-Day Prepper you will find our advice to be of great help in making sure your tent will be keeping you dry for many years to come.
We have shown you how to check your tent for leaks at the seams, doors, and even the sidewalls. You have seen a number of products that will seal your tent from top to bottom. Then we’ve recommended that you create an emergency leak and tear kit to take with you on your outing.
Finally, we asked you to check it all again. (A step that many forget to do in their zeal to hit the road and get to their camping ground)
Finally, you are asked to pack your tent up properly as this step not only protects your tent from spring leaking but ensures that you will have your tent around for this coming camping season but many more to come as well.