
You’re no marksman, let alone a gunsmith, but you’re getting close!
Visits to the gun range are paying off, and last hunting season you tagged your first buck. But still, you might be lacking confidence in your abilities because you can’t seem to dial in your rifle sight just right.
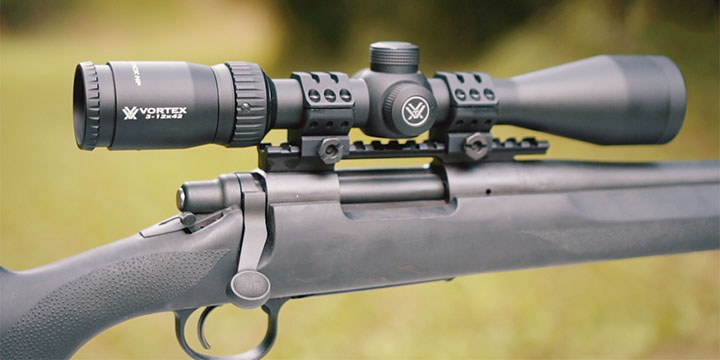
A new rifle scope might be what you’re looking for. Adding an optic sight to your rifle can greatly improve accuracy and thus enhance the overall capabilities of both you and your rifle.
In this post, we’ll explain how to mount a rifle scope.
Table of Contents
How to Mount a Rifle Scope All By Yourself
 It’s your rifle, and it’s understandable you have a hard time handing it over to a shop. After all, outdoorsmen such as yourself like to take matters into their own hands.
Instead of paying more to have someone else to do it, why not learn how to mount a rifle scope yourself? With a bit of patience and practice, even beginners can learn how to mount a rifle scope properly.
The process of mounting a rifle optic is straightforward but can be tedious. The effort will be well worth it when you begin hitting a target from hundreds of yards away every time you pull the trigger.
Check out the steps below to learn how to mount a rifle scope on your firearm in the comfort of your own home.
Secure the Base
 Securing the base mount of your new rifle optic is crucial to ensure its accuracy.
The mount is attached to the rifle itself. It’s subject to all types of jolting forces such as the recoil of the gun and any other bumps and bruises the gun may collect along the way. Because of this, the base mount must be properly secured.
Begin by making sure you have all the correct components for the job. Learning how to mount a rifle scope is much easier when equipped with the right tools and parts. If you don’t have the right equipment there are a variety of rifle scope mounting kits available.
The mount should be placed as low on the body of the rifle as possible. The goal is to keep the scope fitting low and tight. Some adjustments might be necessary before it’s fit for live-action.
Have patience. Taking your time to mount your new scope correctly will pay off in the end.
Match Rings to the Base
When learning how to mount a rifle scope it’s important to research and carefully select the right components. A chart like this can be of tremendous help. The variety of options might seem daunting at first, but, again, have patience.
First and foremost, you need to ensure both the mount rings and the mount itself are compatible with your gun. From there, you need to make sure the rings will set in the base at the correct height. The proper height will have the scope sitting close to the rifle body but not touching. Additionally, there should be adequate clearance for the action of the bolt.
You should keep all surfaces of your gun clean as you learn how to mount a rifle scope. The surfaces need to be secured tightly. To ensure proper installation you should clean the area and add a thin layer of oil to prevent rust.
Evaluate Fit and Alignment
Before you secure the mount and the rings to their final position you’ll have to make sure they’re aligned correctly. Check the fitting of the rings. Sometimes rings can come with small burrs on the outer edges, which prevent the scope from being mounted correctly.
If the edges need to be smoothed out, lightly run a file along with the corners. To further protect the scope from scratches, line the inside of the rings with electrical tape.
The importance of having the rings and the mount properly aligned can’t be stressed enough. If the alignment is off it can create stress and ultimately damage the rifle scope. Visually check the rings and mount to see if they run parallel to the chamber. The use of precision tools is encouraged to guarantee proper alignment.
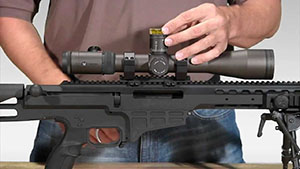
Position the Scope
While teaching yourself how to mount a rifle scope correctly, extra care should be taken with this step. Take a few deep breaths and slow down when getting your scope into its correct position.
First, fit the scope to the rings, but don’t tighten the screws just yet. The scope should be able to move with minimal effort on your part. Leaving this slack in the rings will allow you to adjust the scope to the proper position. The scope should be moved to adjust for the distance from your eye and to level the reticle.
Check the position of the scope by shouldering your rifle while your eyes are closed. Once you have the rifle in firing position, open your eyes and look to see where the scope is. Are the crosshairs of the scope at the front and center of your field of view? If not, make the necessary adjustments.
With your rifle set in a table mount, evaluate the fit of your scope and make sure the crosshairs are level with the base of the gun mount. Make any final tweaks to the position of the scope before moving on to the next step of learning how to mount a rifle scope.
Secure the Scope
Once you have the scope in its final and correct position begin tightening the screws on the rings.
These screws must be tightened gradually to avoid unwanted movement of the scope. To accomplish this, tighten the screws in an X pattern. Turn the screws gradually using partial turns. Once a screw has been tightened slightly, follow the X pattern and move on to the next screw.
Follow this procedure until all screws have been tightened. Care should be taken when giving the screws their final turns as they need to be torqued down to a specific amount of pressure. Check what the mount and ring manufacturers recommend before tightening the screws all the way.
Level the Scope
 You’re almost finished learning how to mount a rifle scope! Hopefully, it’s gone well so far, but there are still a few annoying nuances that need to be addressed before taking your rifle to the range.
As you tighten the screws on the rings to secure the scope, the scope has a natural tendency to turn with the force being applied to the screws. Securing the screws in an X pattern helps to minimize this effect, but there still might be some movement which you’ll have to account for.
To adjust the scope after tightening the screws, you’ll have to loosen them to make the necessary adjustments. Don’t worry, this is normal. To assist you in leveling the scope, use a scope leveling device. These attach to the scope and use air bubbles to indicate whether or not the scope is level. Slowly adjust the scope until the air bubble is at the top and center of the level. A similar device can also be used to ensure the crosshairs are level.
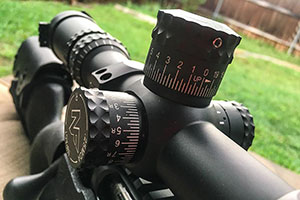
Bore Sight
After your scope is in the right position, you’re ready to begin sighting in your scope. This can be done by removing the bolt from your bolt action rifle, if you have one, so you’re able to see through the bore. Set the rifle in a mounting stand and look through the bore. Focus the bore on an object and adjust the scope accordingly.
This method doesn’t work for all gun types, though. For other types, and for greater precision, consider using a laser bore sighter.
Target Practice
Now for the final and most exciting part of learning how to mount a rifle scope: testing it out!
With your new scope in place and zeroed in, it’s time to pack your backpack and take your rifle to the range. You’ll be amazed just how much your shooting accuracy improves. Once you start hitting bulls eyes you’ll be proud of not only your precision targeting but your new scope mounting skills as well.